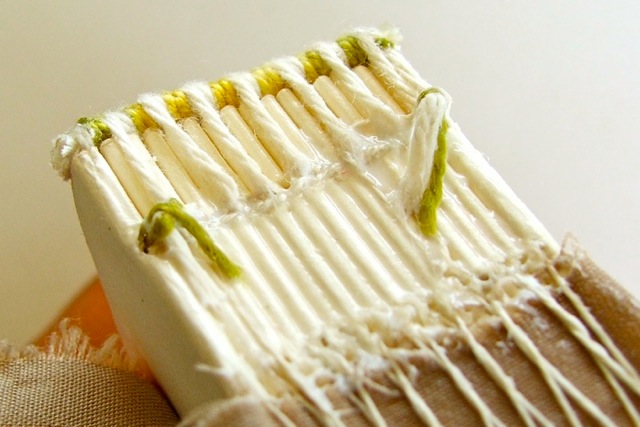
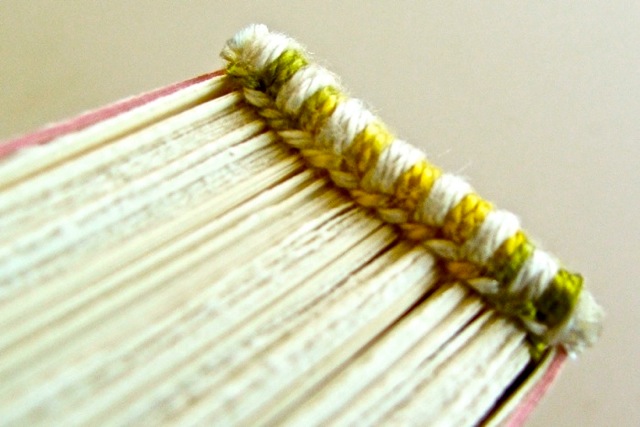
Most frequently used by bookbinders today, the Headband with a Bead on the Edge features a two-color stripey band with little ‘beads’ of alternating colors that sit right on top of the paper and just underneath the headband itself.
I’ve put together a photo how-to for sewing these. Tutorials do exist on the internet for these headbands, and I found a couple eventually, but it wasn’t easy, so I ended up buying a book on the subject; one more tutorial in cyberspace might just make it that little bit easier for people who want to learn.
I have an impish tendency to dismiss traditional materials and use what I like when making something, and so I did a whole bunch of these headbands recently using the same variegated DMC Perle #5 thread that my embroidery favors, and it seems I accidentally solved the question among more orthodox bookbinders of how to use more than two colours when making headbands. It is handy to be a jack of all crafts, sometimes…the things you know from one craft can cross-pollinate the others.
I learned this technique from the book Headbands: How To Work Them, by Jane Greenfield & Jenny Hille (Oak Knoll Press, 2008), and the only thing I have changed in their method is that I start my headband out with the knot on the outside of the text block, where it won’t be seen after the covers are put on.
Equipment & Materials:
- scissors
- a sharp needle large enough to take your thread
- a core of braided cord or leather. I use braided cord approximately 3mm (1/8 “) in diameter
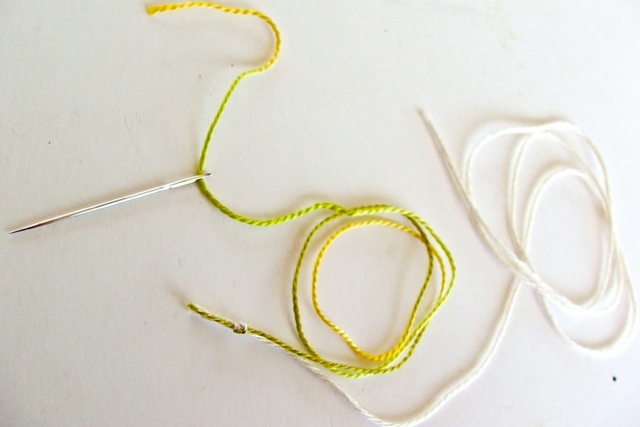
- 2 colors of headband thread, 450-600mm (18″-24″) each (for these pictures I have used yellowy-green variegated DMC Cotton Perle #5, and white crochet thread of the same thickness.
- Clear nailpolish and/or PVA adhesive
Step 1
Tie the threads together with an overhand knot. The white thread will be our tying down thread (A), and the green thread will be the winding thread (B) Thread the green winding thread (B) into the needle.
(Please note: this is completely opposite to the instructions in the “Headbands…” book, but doing it this way will keep the knot on the outside of the signature, where it will never be seen)
Step 2
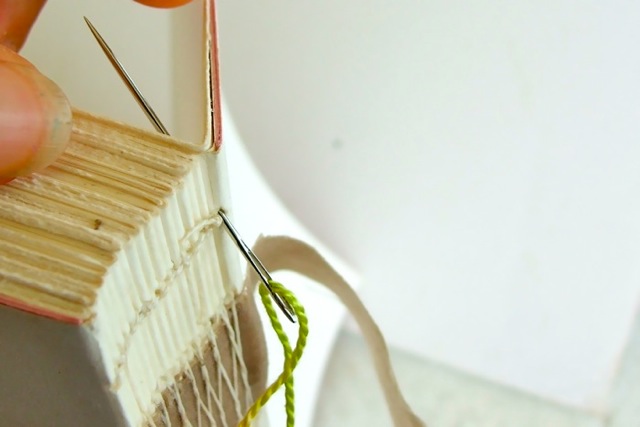
Open the first signature up to its centre and, from the outside, insert the needle (with green winding thread B) into the top hole you tied your kettle stitch in when you were binding the signatures together.
Step 3
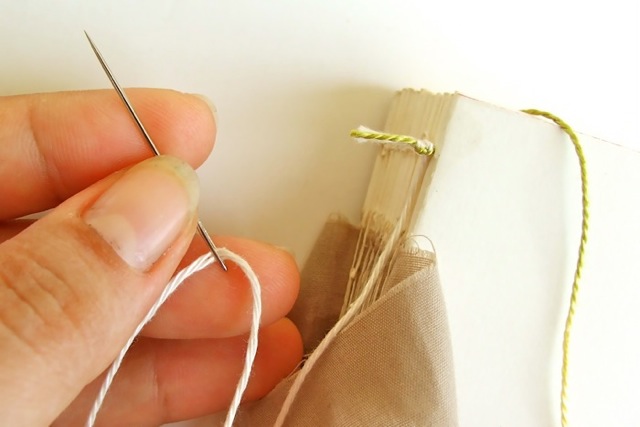
Pull the green thread all the way into the middle of the signature, so the knot is pulled snugly up against the back of the signature. Take the needle off the green winding thread (B) and move it to the white tying down thread (A). Now we can go back to following the instructions from the book…
Step 4
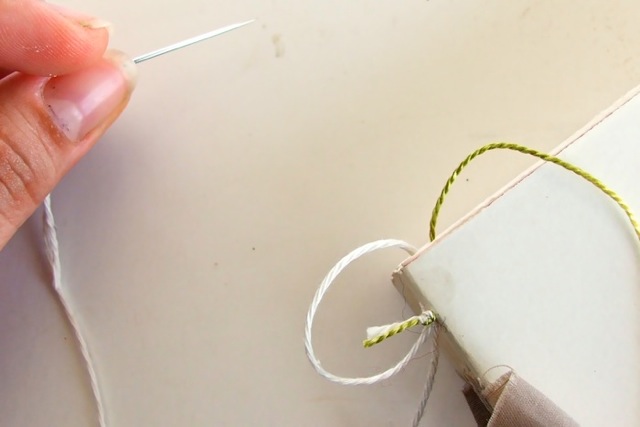
Bring the needle (with the white thread) over the top the first signature, into the centre of that signature, and out at the same kettle-stitch hole we mentioned before. Pull most of the thread through, so that you have a small loop of the white tying down thread (A) formed on the first signature.
Step 5
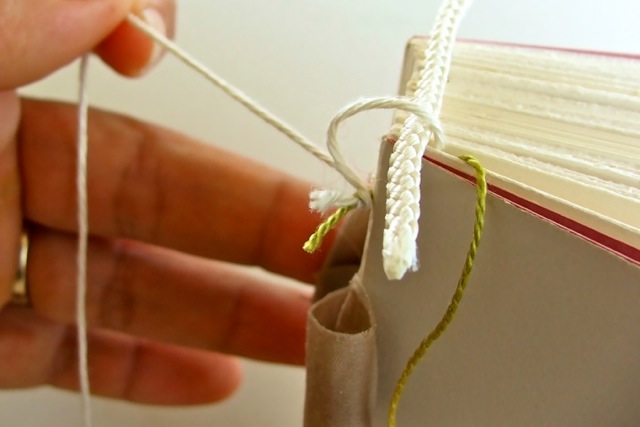
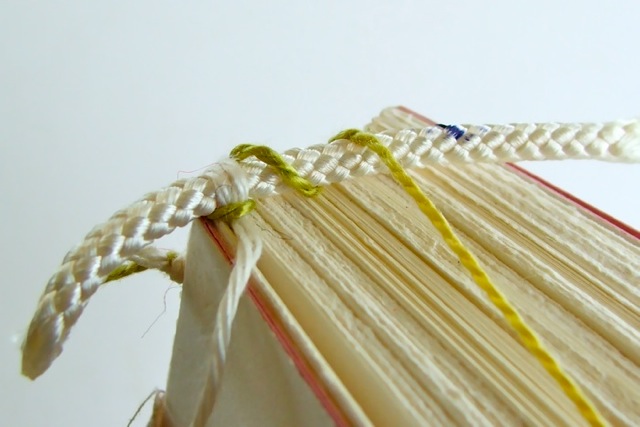
Lay your short piece of core across the top of the book, slipping one end into the loop as shown. Tighten up the loop of white tying down thread (A) so that it firmly holds the core, but not so tight that the core is pulled off. Things are not very stable at this point, so work slowly and gently.
Step 6
Pick up the green winding thread B, slip it under the core to the right, around the back of the loop of white tying down thread A, under the core on the left, and back toward you.
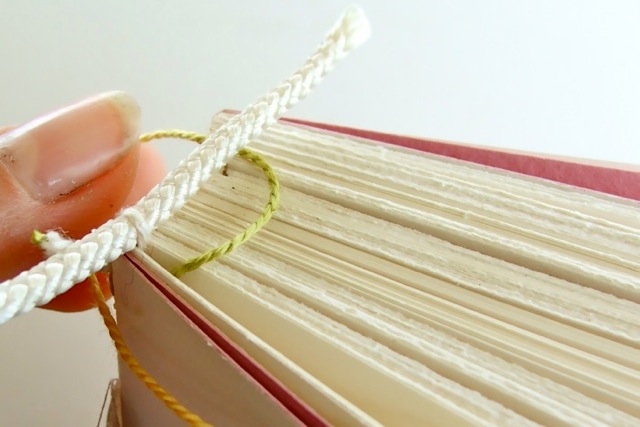
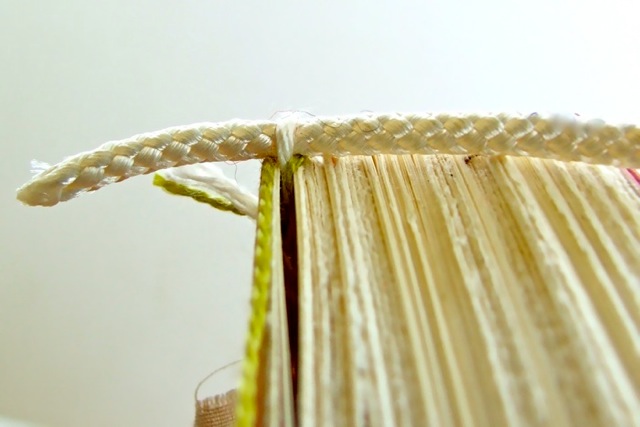
This holds the white tying down thread A firmly. Here’s what it should look like from the fore-edge of the book.
Step 7
Bring the white tying down thread A up from the back of the book and toward you, laying it across the core neatly beside the first white winding. You now have two white (A) windings on the core. We’ll be working two windings of each color over the core.
Step 8
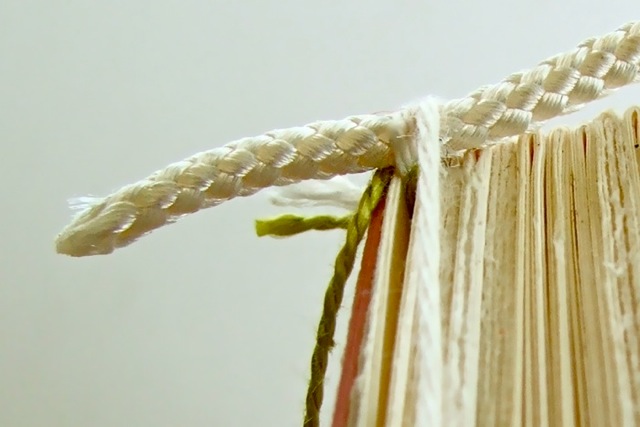
Now, to introduce the green winding thread B, bring it from the left of the book, across white tying down thread A, go under the core and toward the back of the book.
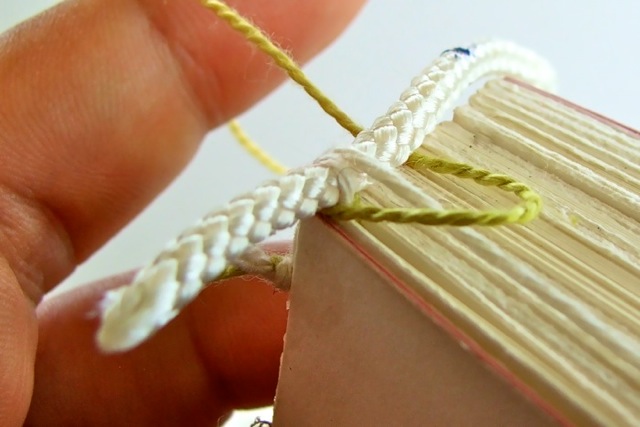
Pull the green thread B gently to form the first (green) bead directly underneath the two white windings.
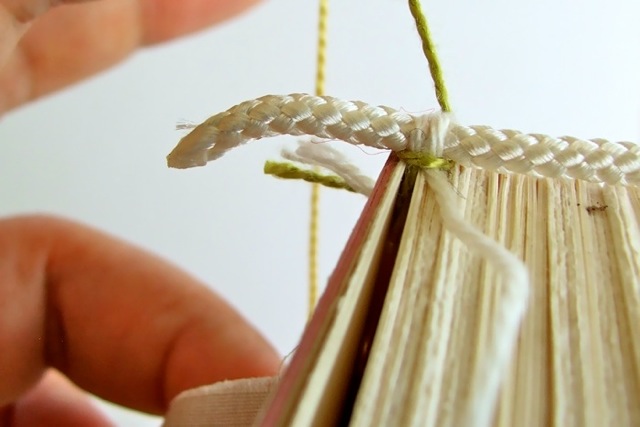
Step 9
Bring the green winding thread B back toward you, laying it across the core neatly beside the white thread A windings. This forms your first green winding.
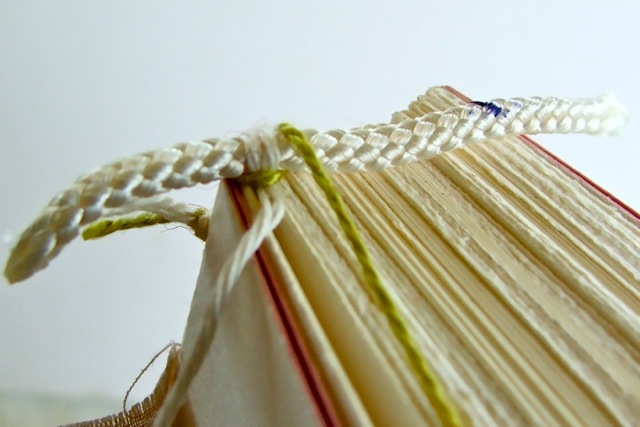
Step 10
Go around the core with the green winding thread B again, forming the second winding. Use a fingernail to push the two green thread B windings, so they sit right up next to the two white thread A windings.
Step 11
Bring the white tying down thread A from the left side of the book and lay it across the green winding thread B, go under the core and toward the back of the book.
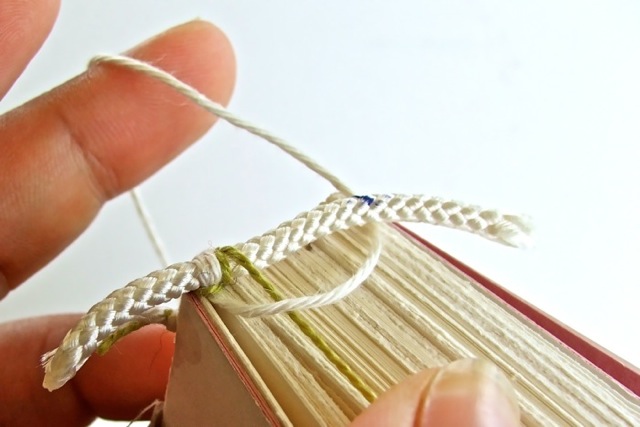
This forms the second bead, a white one, directly underneath the two green windings.
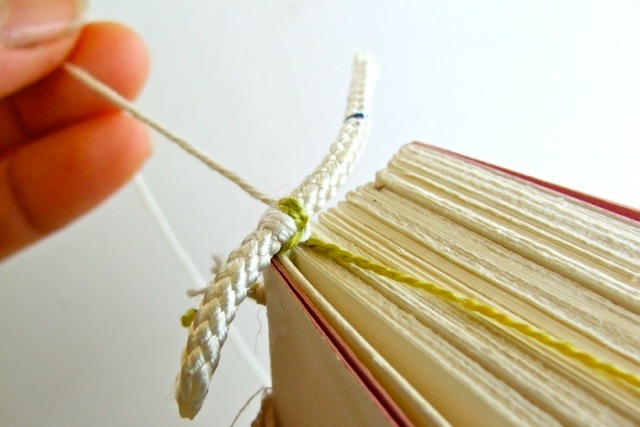
Step 12
Bring the white tying down thread A over the top of the core. With the needle, go down into the center of the signature that is beside the previous green (B) winding, and push out of the top hole (kettle-stitch hole) to the back of the book. Pull the white tying down thread A firmly, making sure the winding lies snugly beside the previous green winding.
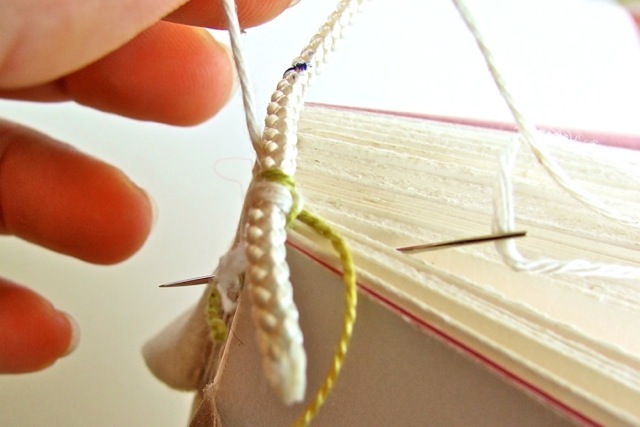
Step 13
Bring the white tying down thread A back toward you, across the core, to form the second white winding of the pair.
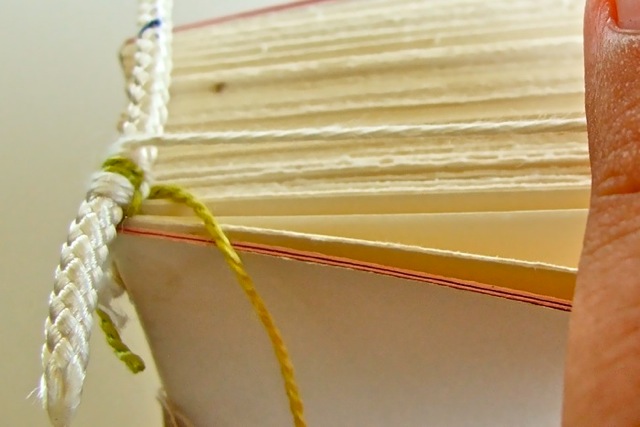
Continue, repeating Steps 8 to 13…
that is, bring the green winding thread B from the left side of the book, crossing over the white tying down thread A and going under the core to form a green bead… and so on…
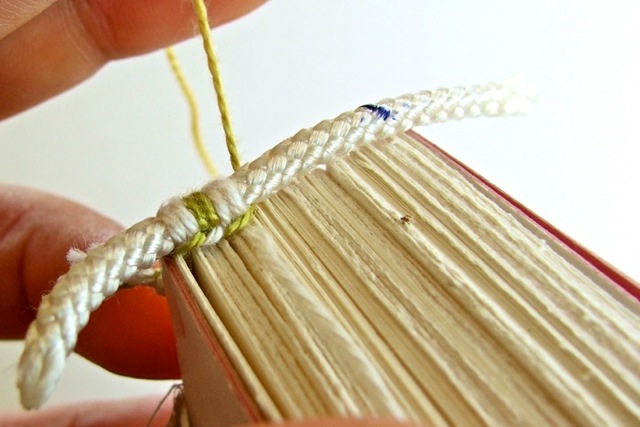
Step 14
At the end of the book, make sure you finish up with the white tying down thread A…make only one winding, taking the needle down into the center of the last signature, and out the kettle stitch hole onto the back of the text block.
Remove the needle from the white tying down thread A, and put it on the green winding thread B. Take this thread down into the same signature and out the same kettle stitch hole.
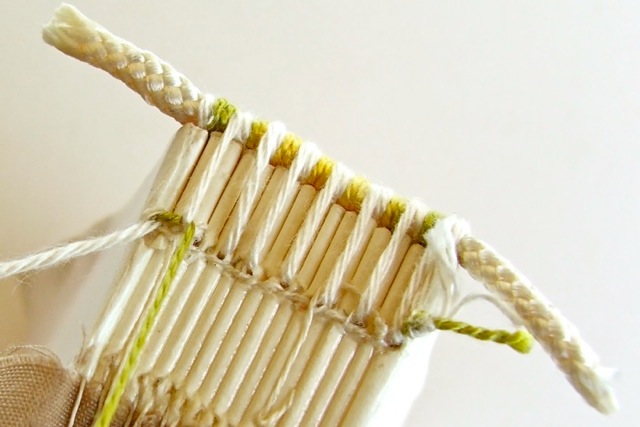
On the back of the book, tie the two threads together using a square knot. Trim the tails.
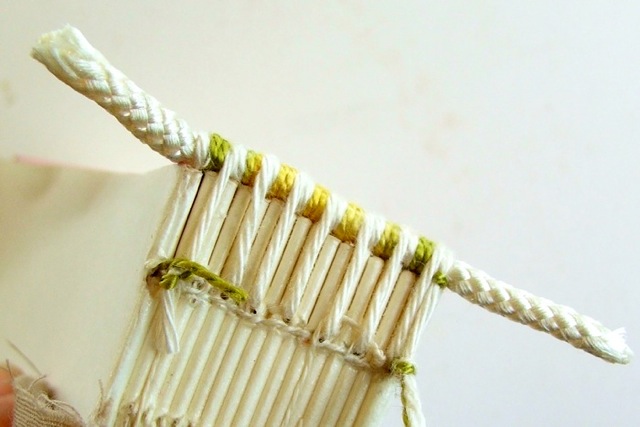
Step 15
Cut the extra lengths of core using sharp scissors. Cut them flush with the beginning and ending of the windings. Be very careful not to cut the winding threads!
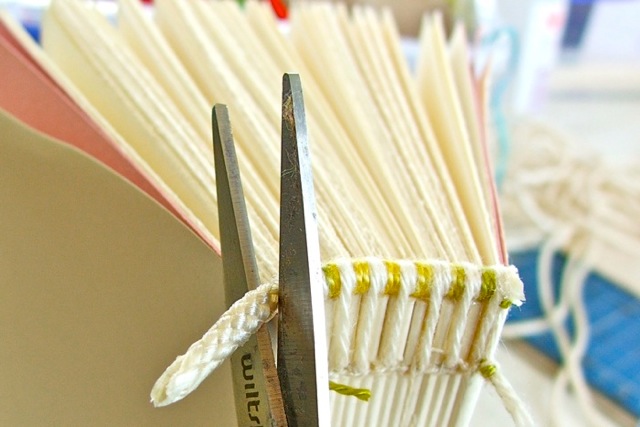
Put a dab of clear nail polish on the core ends to stop them fraying, as well as on the back of a few winding threads on each side, to prevent them coming undone.
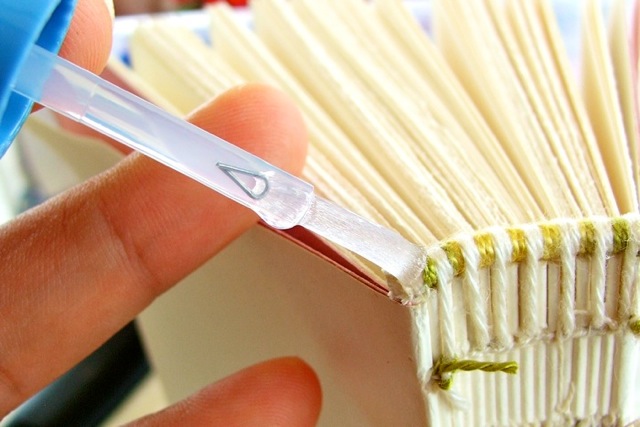
Stick the tail ends of the winding threads down to the back of the text block.
Related Articles
- Projects ” Creations ” Headbands On Handbound Books (cutoutandkeep.net)



Pingback: How To : : Headbands (bookbinding) | the smallest forest
I have seen several headband tutorials, and this one is as clear as any I have seen.
Well done.
Richard
Thank you so much, Richard! I’m thoroughly chuffed that you have taken the time to comment here—I have such reverence for the Eden Workshops!
Thanks for this tutorial, Nat! 🙂 I need to practice before you come over. It always take me a while to get stuff like this, so I need to get the principles down a bit before our workshop in March. Can’t wait! 😀
I love this tutorial, thank you so much for shared.
Yay, Tarlen! You can use them on your handmade books! You make great journals, I admire them very much! Saya dari Pilipinas…orang sama…:) Terima kasih!
Thanks for the concise tutorial.
Oh WOW! Thank you! I am very interested in bookbinding as a hobby, and while I have made my own simple headbands (which were essentially embroidery thread wrapped around a piece of leather cord sown into a piece of cloth which then got glued to the spine) this will look so much more professional. I’m definitely bookmarking this for my next hardbound art journal.
Agnes, you’re so welcome! Happy bookbinding!
Yay, yay, YAY…!!!! I’m a bookbind fanaticus 😀 and this tutorial will make my latest selfbound art journal really complete! I hope to finish it today, and show it on my blog later this week. I will be sure to mention this tutorial, ’cause it’s really great and clear and helpful! Thanks so much!!!
Thrilled to hear it! That’s exactly what I hoped to do with this tutorial…I had a difficult time, myself, trying to find something like this when I wanted to do headbands, and hope this makes it just a little bit easier.
Pingback: picture overload | Marit's Paperworld Blog
Wow–the best description and tutorial I’ve seen on this topic. Great narrative and excellent photos. I’m a retiree just starting out with bookbinding–your lesson is far cleared than any of the many texts I have looked into.
Many thanks,
Terry Hughes
Ottawa, ON, Canada
Oh, gosh, Terry, jeez that’s a huge compliment! Thank you, though I cannot take credit, I myself learned from the books and other masters over the years…to gloat would be ingratitude. I am happy if the tutorial is laid out ina way that you find helpful and useful, though. Happy bookbinding!
Pingback: Watercolour flowers + blog inspiration | iHanna's Blog
Pingback: Becky: How to make a book | An executive assistant, a librarian, & an expat walk into a blog…
Thank you very much; I’ve just started bookbinding and this tutorial was perfect 🙂 I’ll be linking to you when I blog about the (I hope) lovely journal I’m in the process of making!
Thank you very much for the tutorial, very clear and very well explained.
Greetings from Chile =)
An absolutely wonderful tutorial Nat, wish it was around awhile ago for myself, but it has been very helpful in teaching my daughter this technique. So a very big Thank You 🙂
This tutorial is amazing, great pictures and explanation!! Thank you so much 🙂
Nice tutorial. I just bought a bunch of pre-made headbands to use, however I am starting a special gift book and I think that I may just use this technique for the headbands. They look so nice! I’m guessing you’ll end up seeing the thread on the inside of the sections, yes?
Thanks
Hi, Jacob, Thanks! And yes, you’ll see a bit of thread in the center of each section. They’re great to do, and have that traditional feel of a book built from the ground up. 🙂 Enjoy!
This is so clear and straightforward. Great photos, and the variegated thread looks fantastic!
Thank you, Lynn!
Thanks so much for posting this! Very clear instructions and photos. Much appreciated.
Pingback: One Book A Week: Codex with Sewn Headbands, Square Flexagon. Business Cards. | _scribbles and things
Thank you for this tutorial and for using such clear photos to accompany the written text! I’ve used headbands only once, quite a few years ago, and have recently become interested in relearning the process. Like others, I have had a difficult time finding such straightforward instructions… Thanks!
This is an absolutely BEAUTIFUL tutorial! I am so grateful that you posted this because I learn best through pictures or seeing it in person (video works, too). I’m currently making a set of journals right now and I just finished up sewing in the headbands on one…I haven’t picked out the colors for the second. I can’t believe how easy this is! =D Thank you so much! This totally made my day when I stumbled across it. And you’re right…variegated thread is awesome. High five from Washington State. =)
Hey, your comment has made MY day…
Delighted that it’s been useful and that you found the tutorial easy to follow. Thanks so much for taking the time to leave an awesome comment. Enjoy!
Maravilhoso!
Obrigada! 🙂
Thanks for the tutorial.
How would I add a ribbon bookmark? Should I glue it above the headband or put the ribbon first and sew the headband on and through it?
The ribbon would go on the spine AFTER the headbands have been sewn. Usually, the bookmark ribbon goes onto the inside of the book’s case (covers) and not on the text block at all (because the movement of the spine, flexing as the book is opened and closed, could work the bookmark loose).
A fantastic tutorial, thanks for putting it together! I recently put together a gallery of different types of headbands which might be useful for your audience, perhaps you could list it as a resource at the end of your article if you think appropriate? I’ve always found that looking at others work helps boost my creativity. You can find it here: http://www.ibookbinding.com/blog/headband-examples-gallery-book-binding/
Anyhows, thanks for taking the time to upload such a great little tutorial, very impressive.
Keep up the good work,
Paul
Pingback: Making and Sewing Headbands - Video Tutorials - i BookBinding
Really great tutorial, one of the best I’ve seen for hand stitching headbands. I just have one question, do you sew through every single signature or do you skip some?
Thanks so much!
Amy
Hi, Amy, sorry for late reply, just arrived back on terra firma after 40 days at sea. No, I don’t stitch through every signature…I lay the needle alongside the previous wrapping, and determine which signature is nearest to that position, and insert the needle there, to keep stitches from bunching up or crowding.
Hi, I am going to be binding my own book soon for a class I am taking. I would love to sew my own headband rather than buy a pre sewn one to glue in, your tutorial is going to be enormously helpful in this. I do have a question though, where did you purchase your core? The options I have seen are for enormous (and expensive for a student) rolls of 500+ yards.
Thank you!!
Pingback: How To : : Headbands (bookbinding) | from Hell to Breakfast | The Crafters Guild
Have been looking for clear instructruction for making the headbands for some time now. Yours photos and instructions are so clear. I can now put headbands on my home made books. Thank you so much.
Just made my first headbands directly onto the book! Thank you!
Hurray! Really glad it worked out. You’re welcome, I owe it to the book by Jenny Hille
This is probably the best tutorial on sewing a headband as I have seen! Very clear and concise instructions and pictures to see what it looks like. Nicely done!
Wow, that’s high praise indeed! Thank you! Hope it helps.
Marvellous, what a life saver. Many thanks smallforest for your brilliant step by syep photps and desvriptions. Endbands are no longer hellish! Frances